
Three phases with an intermission between the second and the third. Difficulty covered: Heroic, based on our kill; Mythic additions are collected in a separate section at the end.
The core mechanic of the fight is egg management, present in every phase in different forms. Each egg has adds attached to it whose strength depends on how the egg hatches, and the hatch mode is under the raid's control: done correctly it produces weak adds, done wrong it produces the strong ones. In phases 1 and 3 the strong adds are the vipers, manageable in small numbers but not at three or more; in phase 2 producing the wrong add is an instant wipe, because it casts an uninterruptible fear on the entire raid.
Two constants apply throughout. First, the boss and the tail share health and both always need a tank in melee range: if nobody is in range they start damaging the raid and the pull is over. Second, the boss always telegraphs where it will act, and reading those tells is half the fight: the wing that stays in the water marks the side the waves will not come from, and the bubbles that appear from the pool mark where the boss will resurface after submerging.
Everything else rests on one piece of prep: the raid splits into two groups, as equal as possible in number and composition. You want the same number of tanks and healers per side and, as far as possible, the same spread of raid-buff classes. You also want one Warlock per group, because in phase 2 the two groups end up on two separate platforms and the Demonic Gateway is the clean way to reach them: the alternative is crossing the venom.
TL;DR
What to do
Everyone
- Before the pull: the raid is split into two mirrored groups, one Warlock each. All soak assignments are built on that split.
- Phase 1 and intermission: the soaks generated by the tails are what break the eggs, and that's how weak adds are produced. These aren't soaks to avoid, they're soaks to take.
- Phase 1: don't get hit by the waves while carrying an egg, or a viper hatches.
- Phase 2: pick up every small egg before the big one, and take them to the cauldron.
- Phase 3: each role group covers its own eggs and its own soaks, and anyone targeted outside their group relocates.
Tank
- Always: one tank in melee range of the boss, the other in melee range of the tail. Neither out of range at any point.
- Phase 2: the tank grabs the Warden and takes it immediately past the grate, which is what triggers Shadow Molt and activates the eggs.
Healer
- Phase 2: breaking Grasping Fangs applies stacks to the raid equal to the number of chains broken together. Three at once needs raid cooldowns and personals.
- Phase 3: spread damage depends on how well the circles were soaked, so unbalanced circles mean a heavier spread.
- Phase 3: spread followed by the platform break is the damage peak of the fight.
DPS
- 1:55: Bloodlust. The boss phases at 2:35 and the heart window falls in between, so 1:30 cooldowns are held until here.
- Phase 2: the eggs activated by the Warden have a 20-second cast to be killed within.
- Phase 3: absolute priority on the add applying the 45-second DoT, then Shriekers, then eggs.
- Phase 3: melee break off the boss to handle their own eggs.
What can kill you
| Mechanic | When | How to avoid it |
|---|---|---|
| Venom waves | Phase 1 and 3 | The boss's wing left in the water marks the safe side |
| Tail area | Phase 1 | Avoided by standing outside the circle, it isn't soaked |
| Grasping Fangs | Phase 2 | Walk out of the circle to break the chain, but coordinate the cost |
| Spread after soak | Phase 3 | Damage scales with how well the circles were soaked |
| Platform break | Phase 3 | Lands during the spread: this is the moment for immunities |
| Falling debris | Heart window | To be dodged while burning |
What wipes the raid
| Mistake | When | Consequence |
|---|---|---|
| No tank in melee range of boss or tail | Always | Both start damaging the raid |
| Big egg picked up before the small ones | Phase 2 | Every small egg hatches at once |
| Big egg not taken to the cauldron | Phase 2 | The add that casts an uninterruptible raid-wide fear emerges |
| Waves taken while carrying an egg | Phase 1 and 3 | A viper hatches; at three or more the phase stops being playable |
| Too many chains broken at once, no cooldowns | Phase 2 | The raid stacks aren't healable |
| Eggs not killed within the 20-second cast | Phase 2 and 3 | The strong adds emerge |
Timeline
| Point | Phase | What happens |
|---|---|---|
| Pull | Phase 1 | Three eggs at the center. The tail spawns left or right and generates two soaks that break the eggs |
| Cycle | Phase 1 | Venom waves, a free-for-all second egg set, a new tail with two more soaks |
| 1:55 | Phase 1 | Bloodlust |
| ~2:20 | Phase 1 | The boss exposes the heart: maximum burn, debris to dodge |
| 2:35 | → Phase 2 | End of the channel, the raid splits across the two platforms |
| Phase 2 | On two platforms | Warden taken past the grate, activated eggs to kill, Grasping Fangs, egg collection, cauldron |
| ~4:35 | Boss returns | Second damage-amp window, cooldowns again |
| ~40% | → Intermission | Six soaks from the tails at the corner world markers, three odd and three even |
| Then | Phase 3 | The raid is knocked upward. Platform in four sectors, boss rotating counter-clockwise |
| End | Heart | At the end of the heart channel you don't wipe immediately: a window remains to close |
Was this summary useful?
Detail
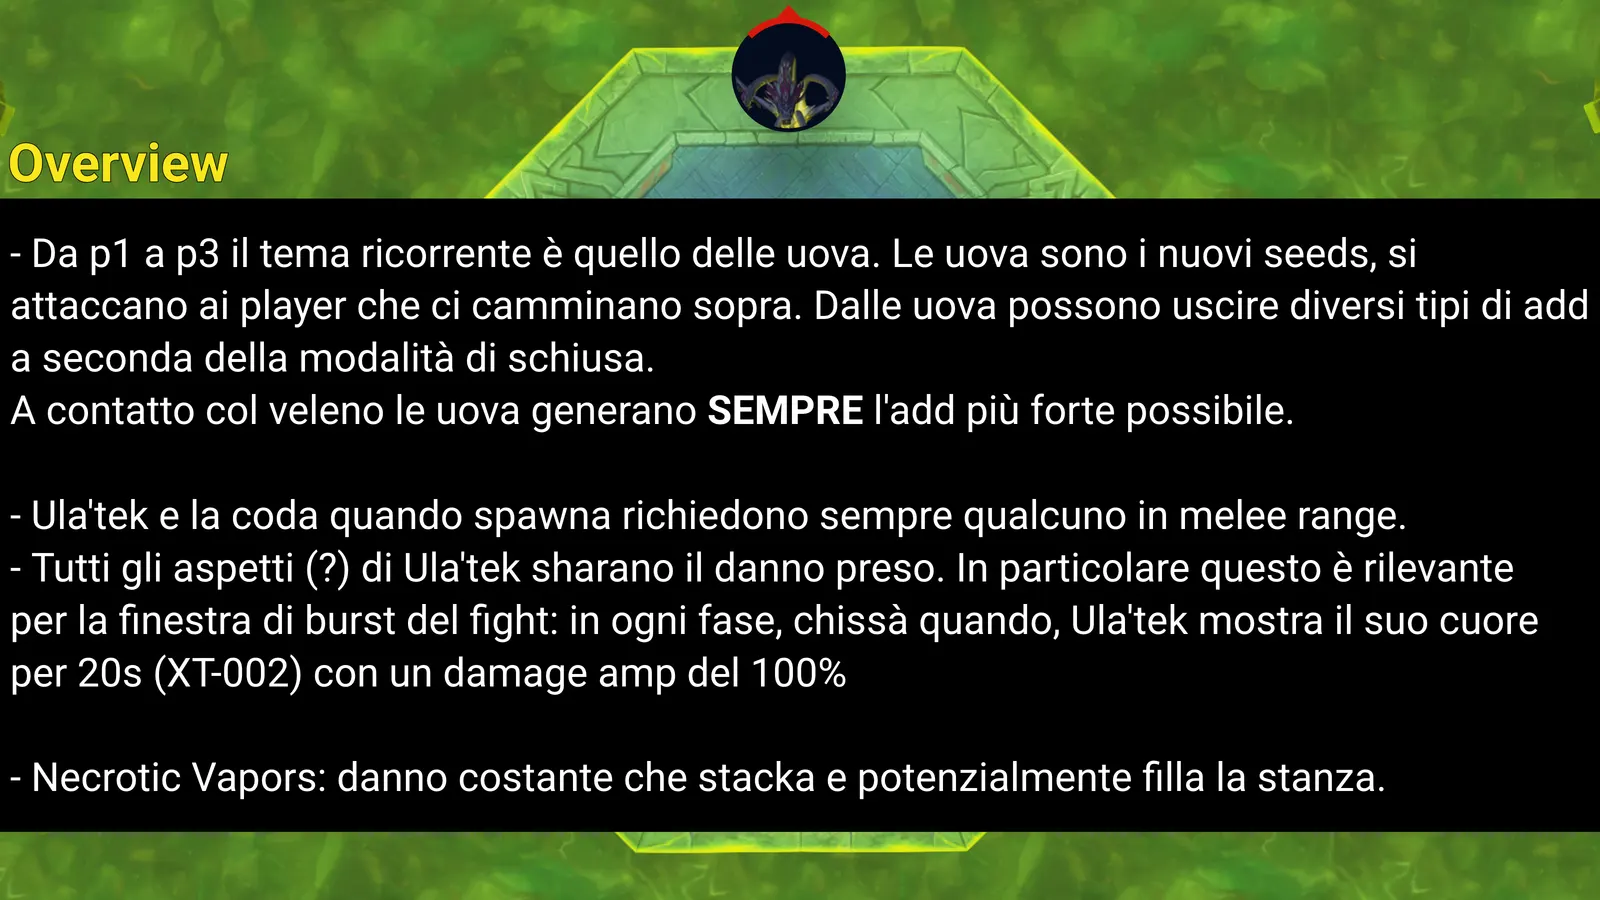
The two foundational assignments
The two-group split underpins the whole fight. The groups should be equivalent in number and composition, with the same number of tanks and healers, a similar spread of raid-buff classes, and one Warlock each.
The tail soaks are assigned to the two groups using a reference that changes between phases:
- Phase 1: group 1 takes the soak nearer the boss, group 2 the farther one.
- Intermission: the reference becomes spawn order. Group 1 takes the odd soaks, group 2 the even ones.
Using proximity in phase 1 is a subjective choice: spawn order works there too. In our kill proximity proved quicker to call.
The eggs
Eggs appear in every phase and each has adds attached to it. Which add emerges depends on the hatch mode, and the mode is under the raid's control, so there is no unlucky version of the mechanic: there is only well executed or badly executed.
There are three handling modes, one per context:
| Context | How it's handled | Done right | Done wrong |
|---|---|---|---|
| Phase 1 and intermission | Eggs are picked up by walking over them and broken by the tail soaks | Weak adds | Vipers |
| Phase 2, Warden-activated eggs | Must be killed within the 20-second cast | Weak adds | Strong adds |
| Phase 2, collected eggs | Must be taken to the cauldron | No adds | The big egg produces the wipe-level add |
In phase 3 the eggs work like the Warden-activated ones: they cannot be picked up, they have a 20-second cast and must be killed within it.
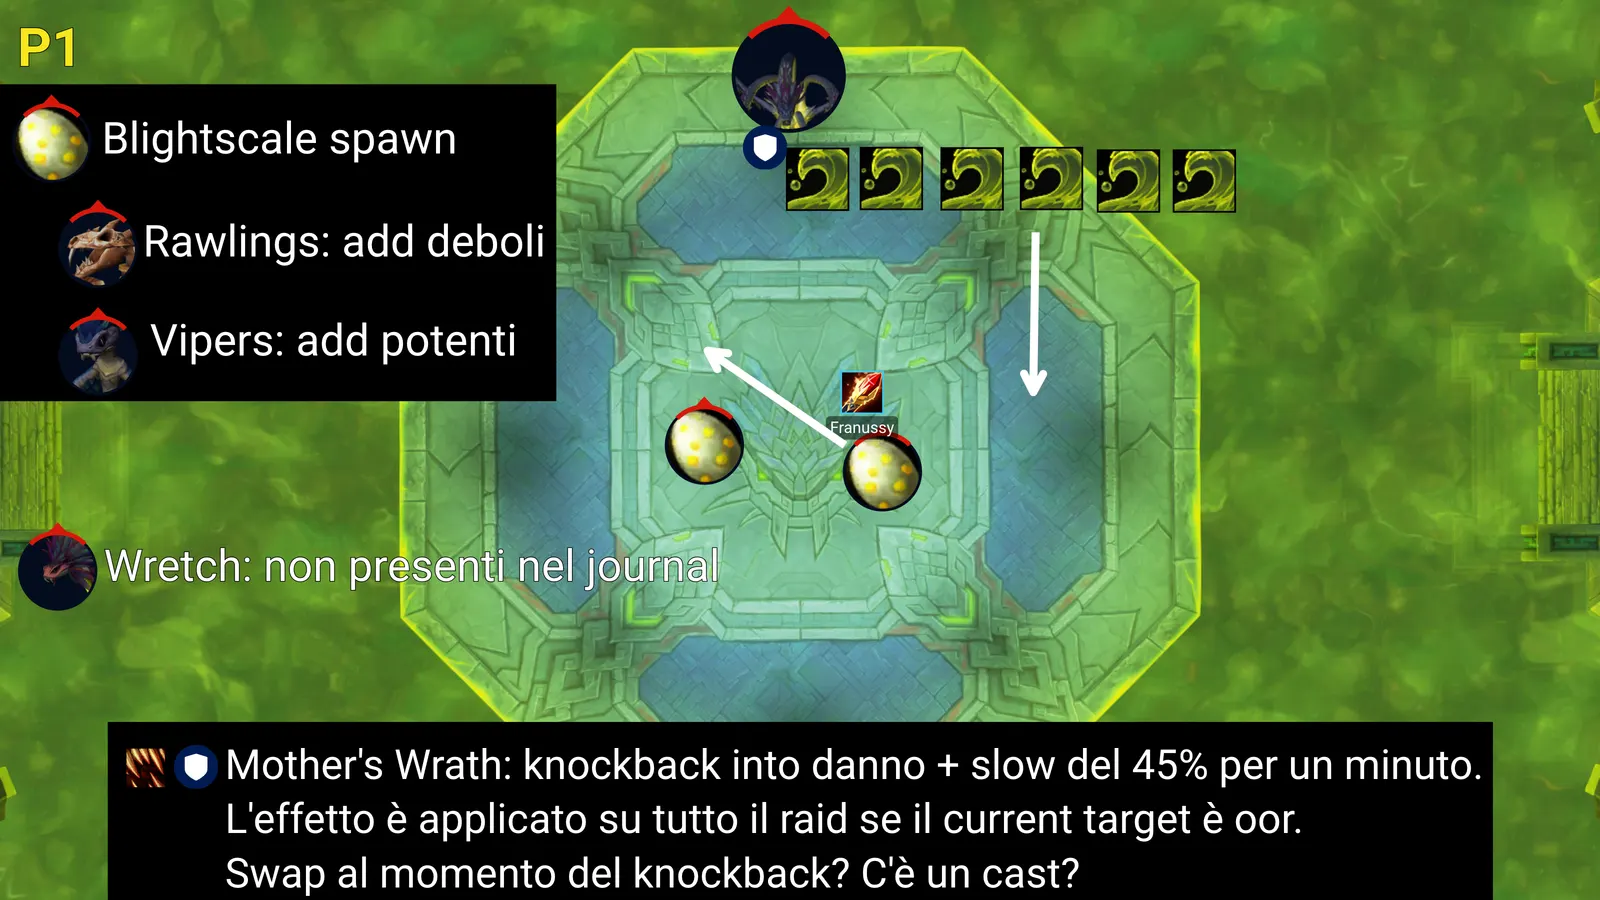
Phase 1 — Fury of the Serpent Mother
On pull there are three eggs at the center of the arena. They're picked up by walking over them and attach to the player.
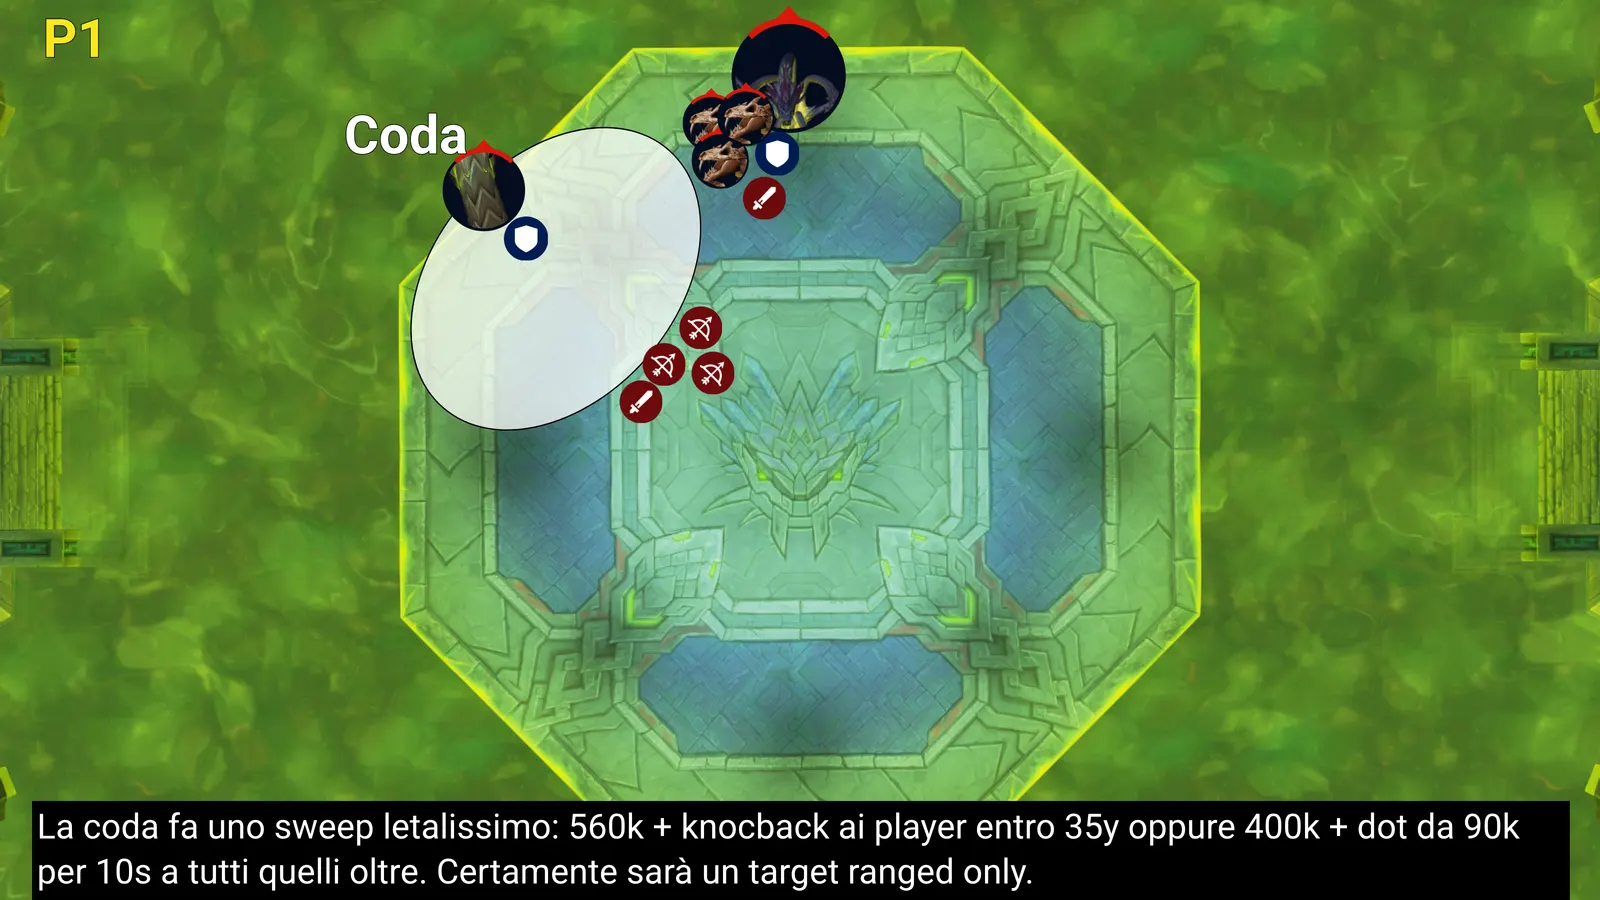
The tail
The tail spawns left or right, and shares health with the boss: both can be hit and the damage feeds the same pool. It needs a tank in melee range up until it generates the soaks.
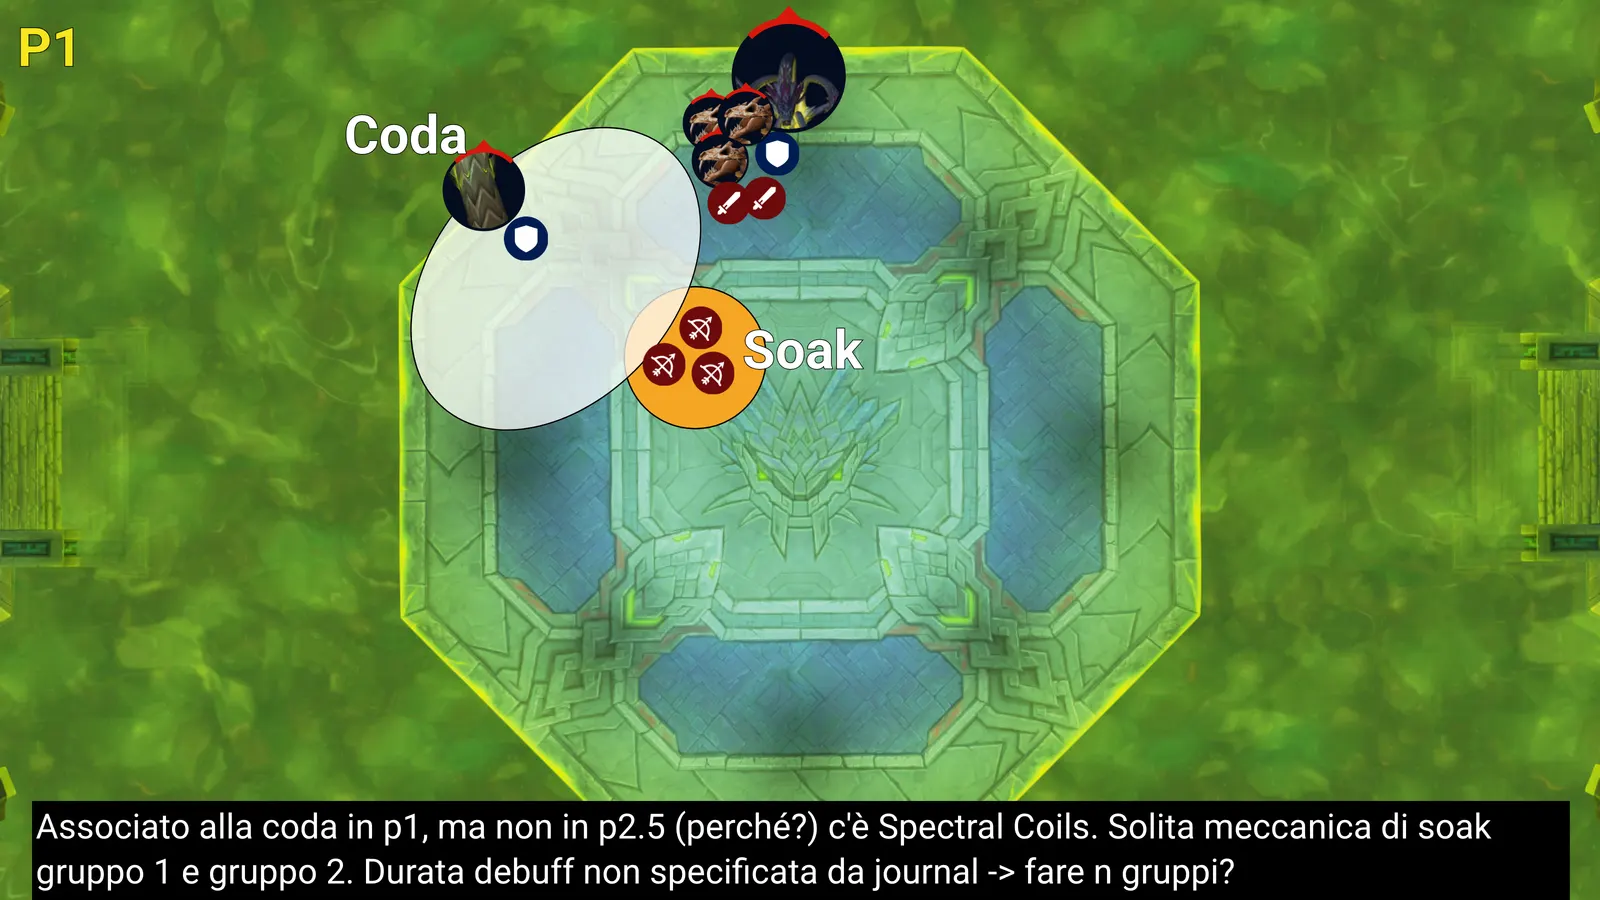
It generates two soaks: one nearer the boss, handled by group 1, and one farther out, handled by group 2. The soaks are what break the eggs, and this is the correct hatch mode: three weak adds emerge from the three eggs.
After the soaks the tail creates an area that is simply avoided by standing outside the circle, and from that point it no longer needs a tank in range.
The venom waves
The boss summons waves out of the pool. Being hit while carrying an egg hatches a viper, the strong add of the phase: one is manageable, two are awkward, three or more turn the phase into a problem.
The direction is read off the boss. The wing that stays in the water marks the side the waves will not come from, so that's the side to move to; the raised wing marks the incoming direction. They're two readings of the same tell, use whichever you prefer.
After the waves the boss submerges into the venom. Where it will resurface can be read two ways: the boss turns and moves toward the direction it will come up in, and bubbles appear from the pool at the exact resurfacing point.
The second egg set
The following set is the busiest of the phase. These eggs are not assigned: it's free for all, everyone grabs what they can, then the waves are dodged. The tail then generates the second pair of soaks with the same pattern as before.
 Spectral Coils
The tail soaks are the egg-breaking mechanic described above. Damage is split among the players in the circle, so each group covers its own soak in full rather than splitting further.
The heart window
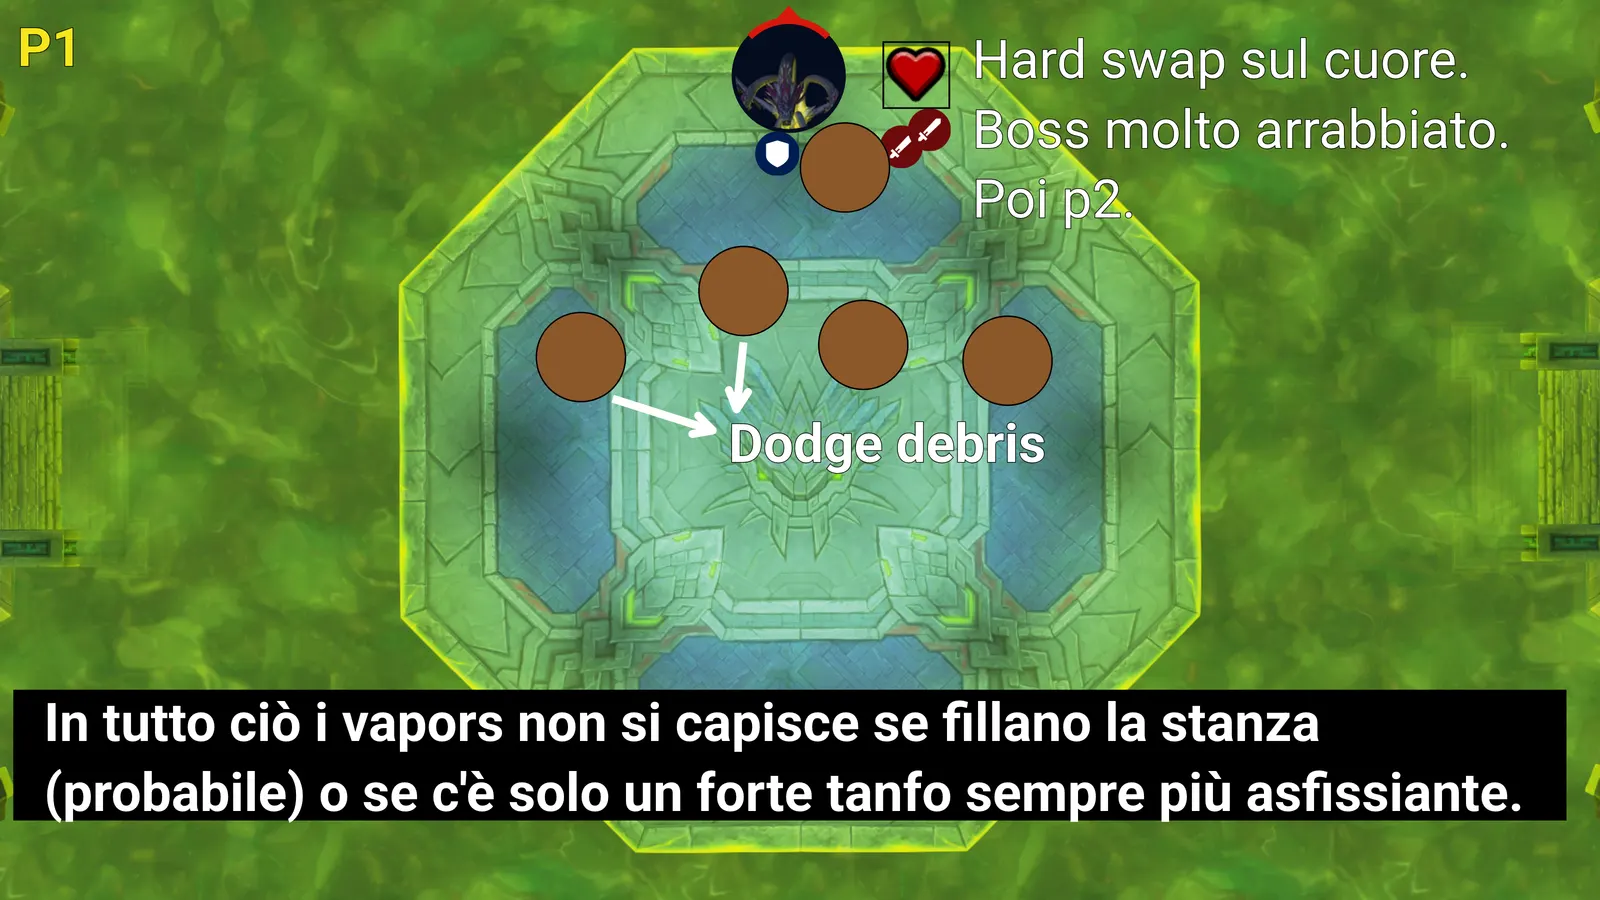
Bloodlust goes at 1:55, because the boss phases at 2:35 and exposes the heart in between, which takes amplified damage. Classes with 1 minute 30 cooldowns therefore hold them until that point instead of using them on pull.
While the heart is being burned, debris falls from the ceiling and must be dodged. At the end of the channel the boss moves to phase 2.
Phase 2 — Children of the Doomscale
The raid splits: one group stays at the boss's position, the other goes back, per the assignments. Each group reaches its platform with a Demonic Gateway; without a gate you cross the venom.
The Warden
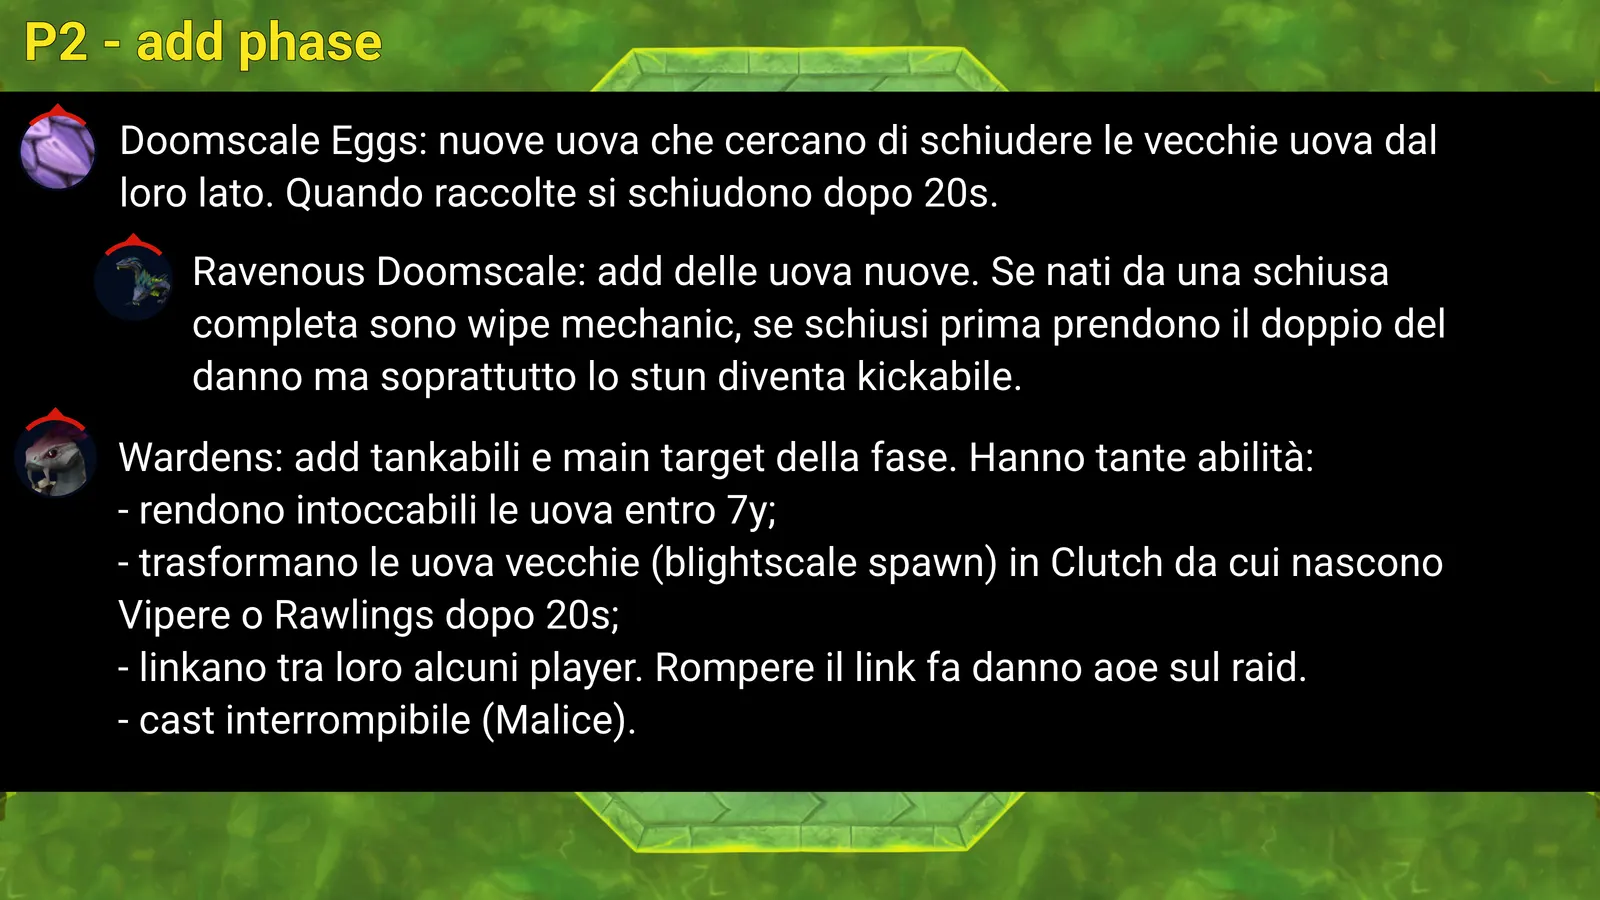
Each platform has a Warden, and the opening sequence is precise: the tank grabs it and takes it immediately past the grate. Once that's done the Warden instantly casts Shadow Molt, goes underground and teleports to the nearest eggs, activating them.
Activated eggs become attackable and carry a 20-second cast within which they must be killed, or the strong adds emerge.
Grasping Fangs
This is the Warden's main mechanic and the only thing that can seriously wipe the raid in phase 2. At the end of the cast several players are chained and show a prominent circle around them; the chain is broken simply by walking out of the circle. Three players per platform are affected.
When the chains break, the raid receives stacks equal to the number of chains broken simultaneously. That makes the breaking order a tactical choice: breaking everything together is fast but expensive, breaking one at a time is safe but slow.
In our kill we used 3, then 2, then 1, covering the three simultaneous chains with raid cooldowns and personals. That's an aggressive approach; 2-2-1 or 2-1-1 also work and are more conservative. The choice depends on healer throughput and personal availability, but handling them quickly leaves more room for the rest of the phase.
Egg collection and the cauldron
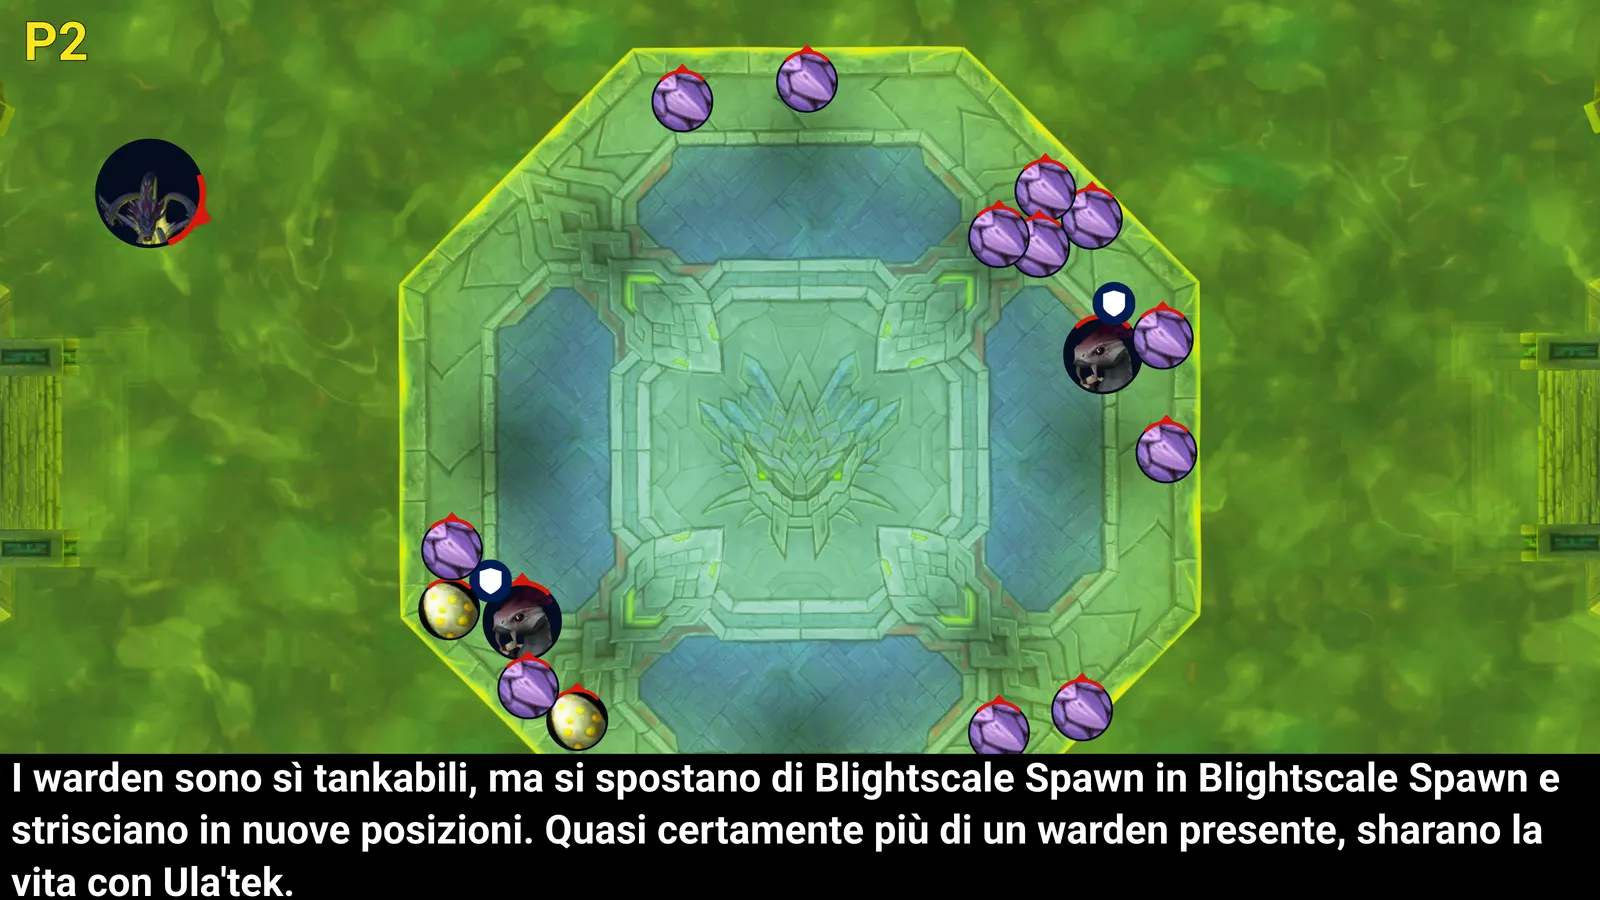
When the Warden dies, all remaining inactive eggs can and must be picked up by walking over them.
There is a mandatory order and it isn't documented anywhere: all the small eggs first, and only then the big one at the back. Picking the big egg up early hatches every small egg at once. We found that out by getting it wrong.
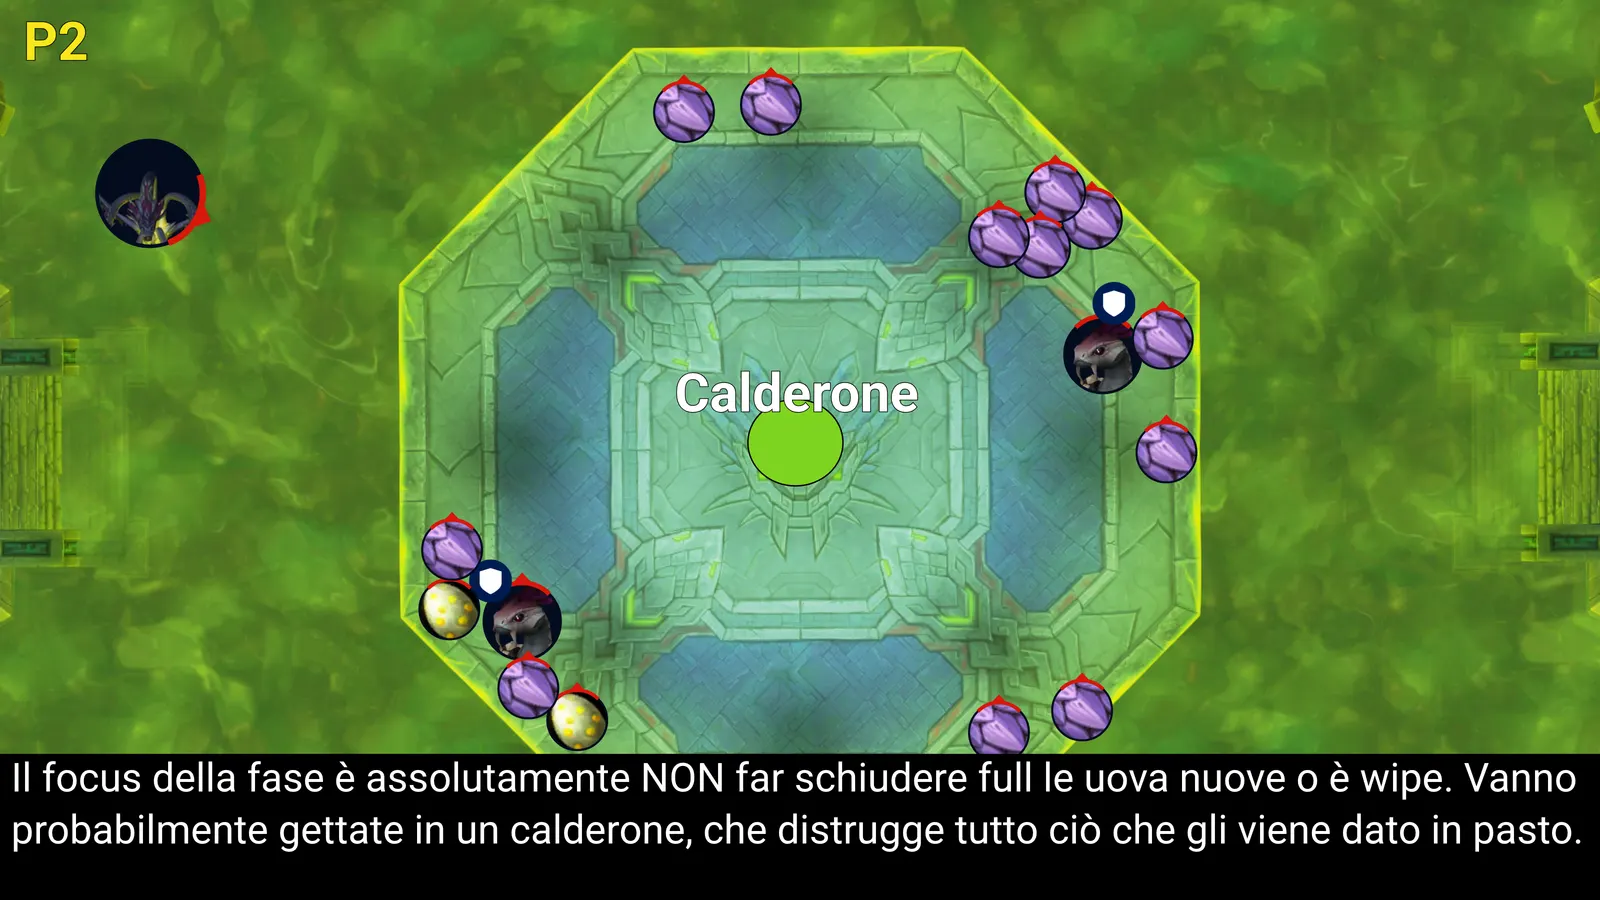
Collected eggs are taken to the cauldron, which sits at the entrance of the platform and destroys them. Taking the big egg to the cauldron is the non-negotiable part: if it hatches it produces the add that casts an uninterruptible fear on the entire raid, which is a wipe.
Handled this way the phase only produces weak adds, and the Weakened Doomscale from the big egg is the highest-priority target.
Returning to the center
Once the adds are dead you wait for the Demonic Gateway to come back up. The useful cue is the frontal cone on the tank: from that point you can head back to the center.
At around 4:35 the boss reappears and a second damage-amp window opens, where cooldowns go back out. Coming out of it at 40% or slightly below is the right pace.
Intermission
The odd and even soaks generated by the tails come into play, with group 1 on the odd ones and group 2 on the even ones.
The tails appear from the world markers in the corners of the arena, so it's worth placing them there: they serve as the reference for calling soaks.
The sequence is: eggs appear, they're picked up, and the soaks break them. Six soaks arrive in total, three odd and three even. All the resulting adds are killed and the fight moves to phase 3.
Phase 3 — Ula'tek's Ascension
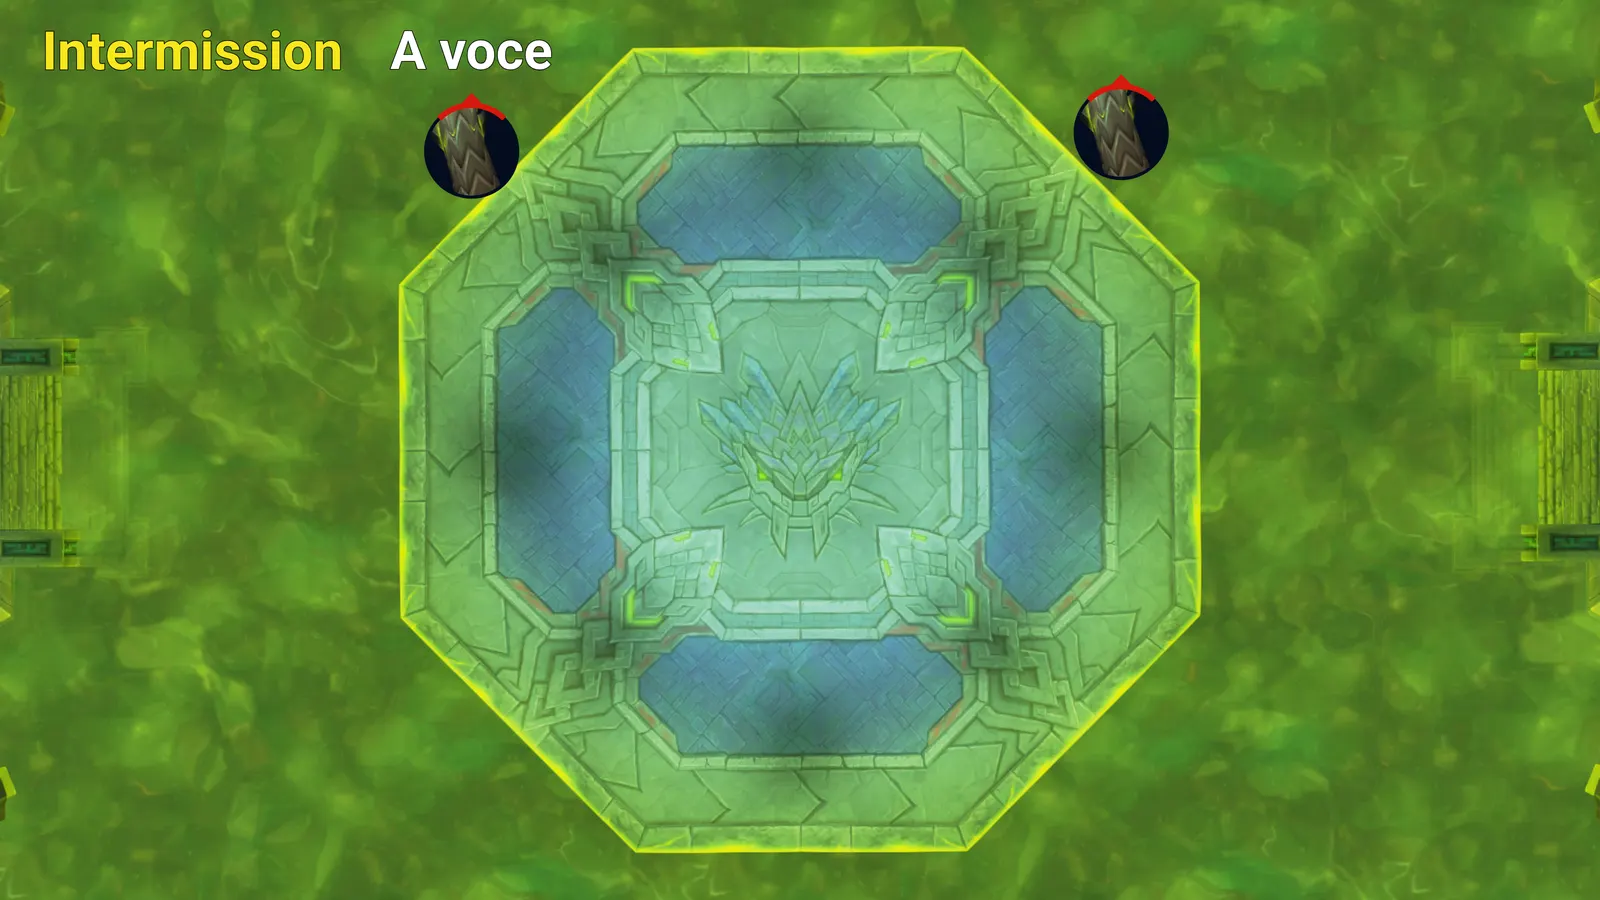
At the start of the phase the raid is knocked upward, so it's worth finishing the intermission roughly at the center of the arena. Where the boss reappears is read off the bubbles, as in phase 1.
The boss appears on one platform and from there always rotates counter-clockwise. That makes everything else predictable.
Phase 3 eggs
They aren't like the phase 1 eggs: they cannot be picked up. They behave like the Warden-activated ones, with a 20-second cast to kill them within.
Assignment follows the boss's rotation:
- Melee: the egg on the platform in front of the boss and the one to the right.
- Ranged: the egg on the ranged platform, one sector counter-clockwise from the boss, and the one behind.
Melee have to break off the boss to handle their own eggs. If they don't, the resulting adds become unmanageable.
The three-role soak
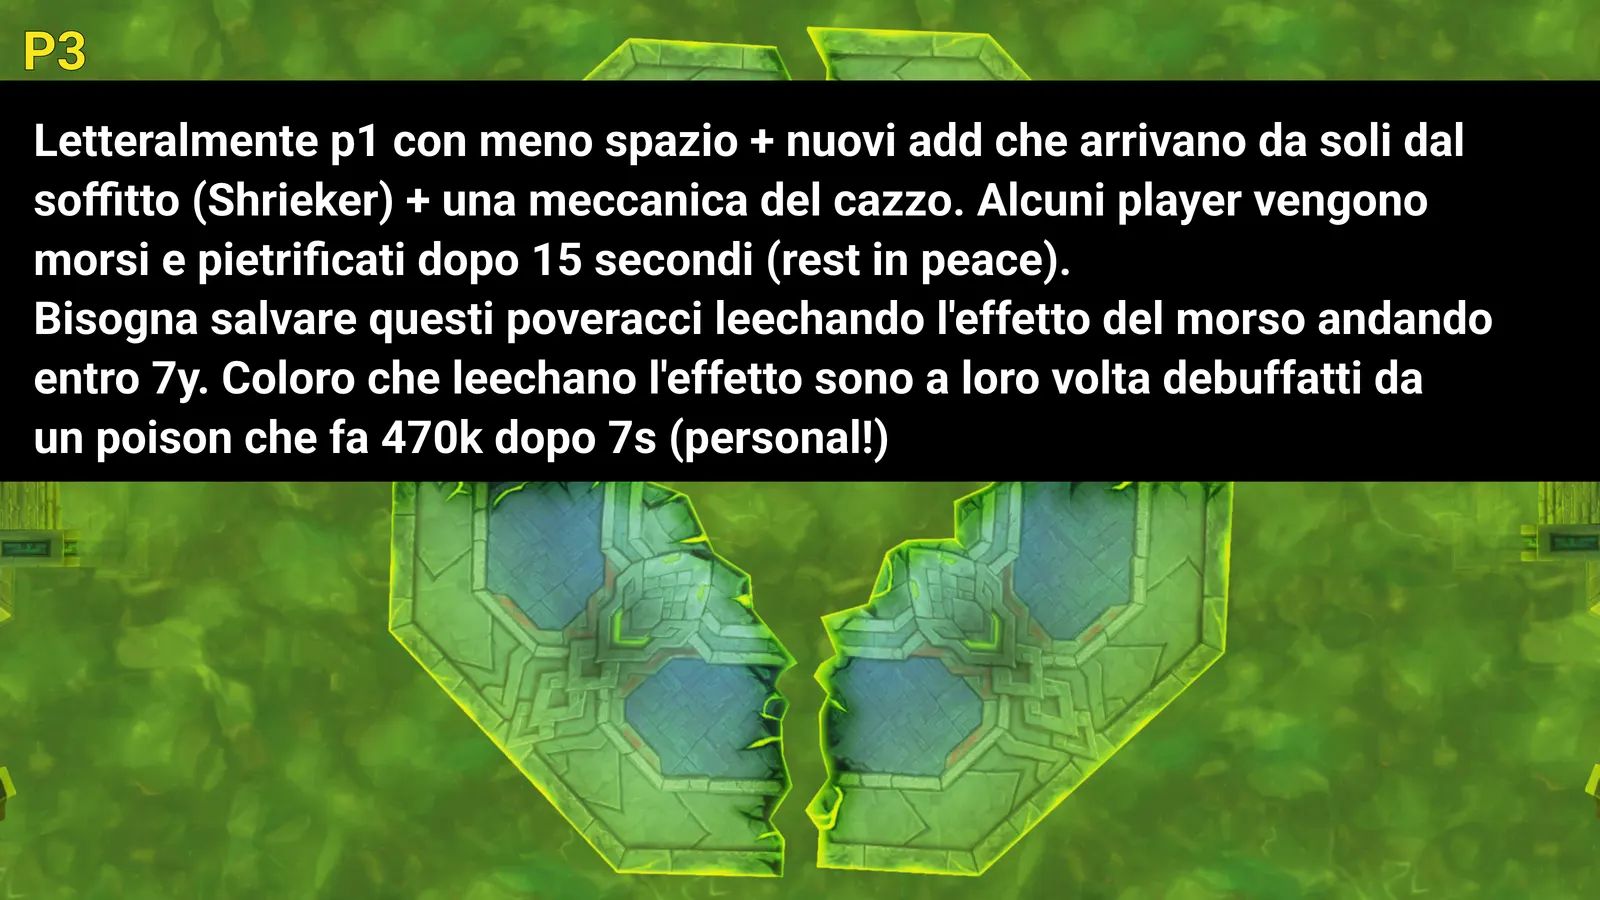
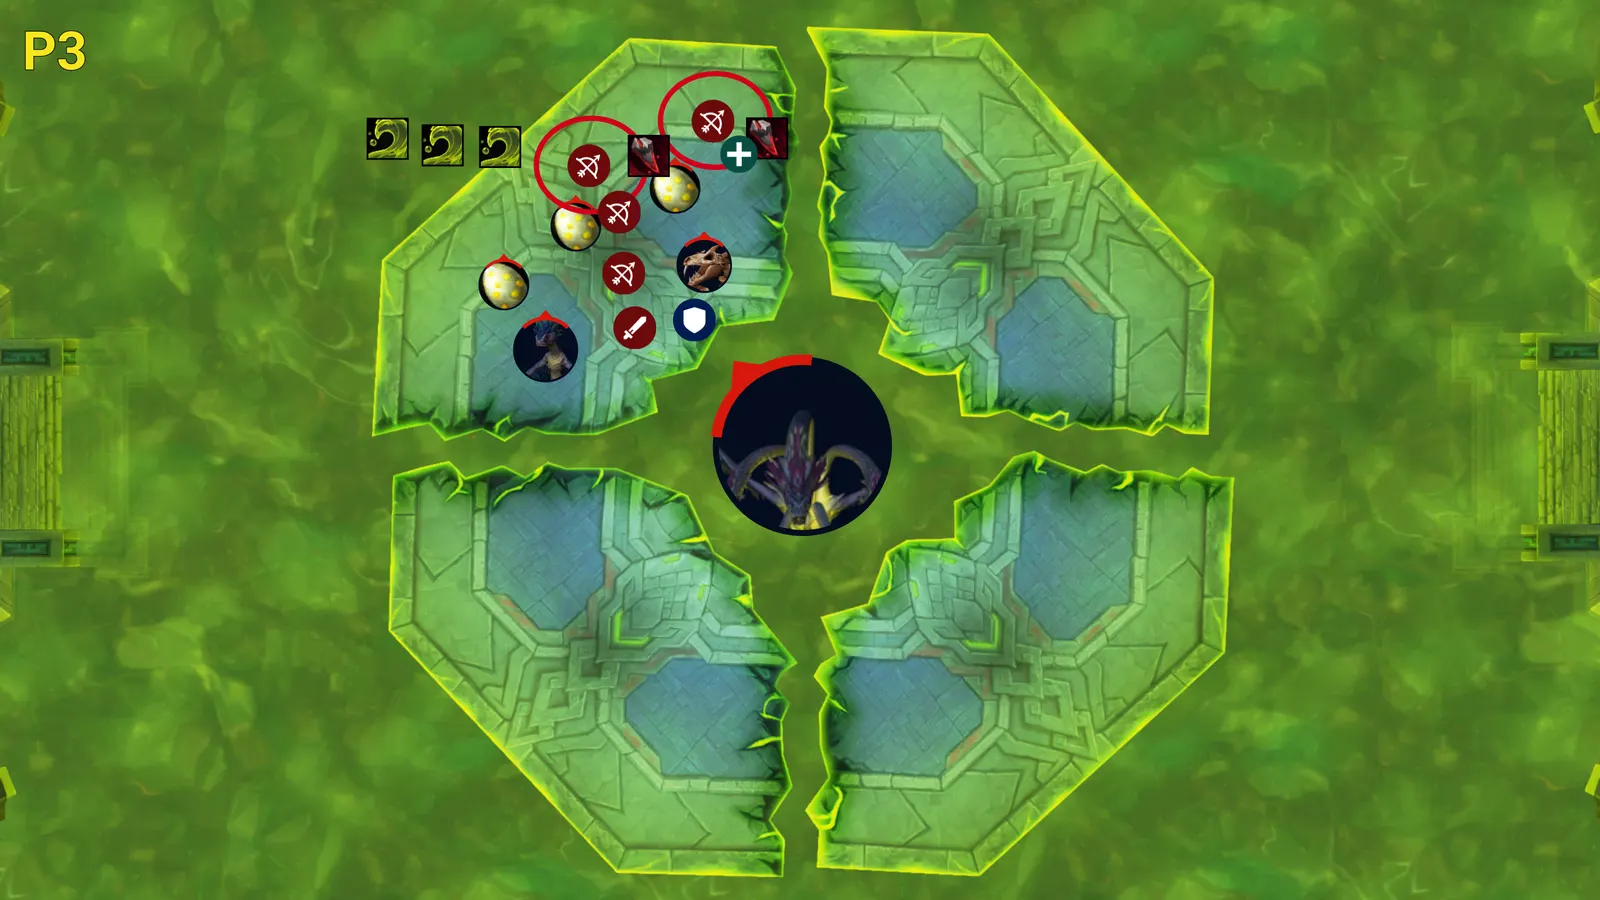
This is the key mechanic of the phase. The boss always targets one melee, one healer and one ranged DPS with red circles, which are group soaks.
Since the targets are always those three roles, the raid sets up accordingly: melee on one platform, healers slightly forward, ranged further back.
Two rules make the mechanic reliable:
- All three circles must have the same number of players. After the soak comes a group spread, and the spread's damage depends on how well each circle was soaked: unbalanced circles mean a heavier spread. That's why assignments deliberately place players out of role — for instance a Demon Hunter in the melee group and three ranged DPS in the healer group — to even out the numbers.
- Anyone targeted outside their own group relocates. If a ranged assigned to the healer group gets the circle, they move to the ranged group. The exception is Evokers and Demon Hunters, who have range problems: in that case the healer moves instead. A Mage with 40 yards just moves.
The second egg set arrives during this sequence and is handled identically.
Waves and lanes
The phase 1 waves return, but modified: orbs appear in front of the boss and in some spots a free lane remains. Players have to slot into the lane to avoid being hit.
The platform break
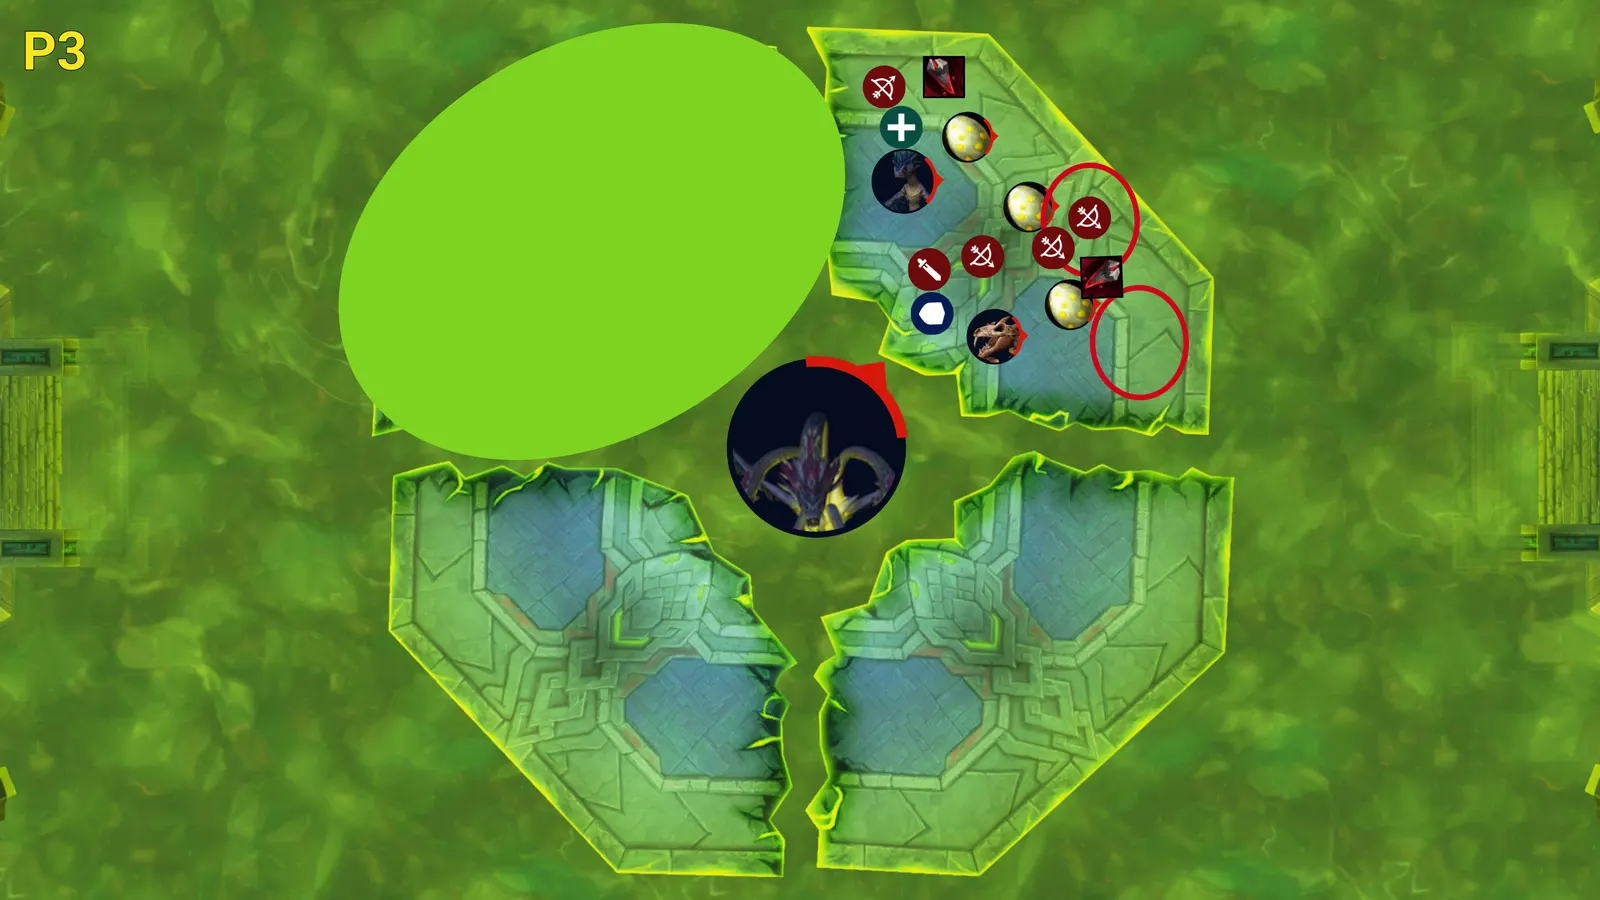
The boss breaks the platform, and the movement is pre-organised: ranged shift one platform counter-clockwise to make room for melee.
The hardest moment
It's the passage right after the first break, and it stacks three things together.
A new add with top priority appears, applying a 45-second DoT to the entire raid, and must be killed immediately.
The three-role soak arrives while the waves are going out, so each group has to call its movement direction on voice. In our kill the melee called their direction and moved as a block; ranged have more space and can manage without calling.
And the platform breaks during the spread, in a couple of seconds. Spread damage followed by break damage is the highest peak in the fight: this is the moment for immunities and big personals.
Blightscale Shrieker
After that passage the pace drops. Soaks resume with the same pattern, one melee one healer one ranged, and the eggs come back accompanied by two Shriekers.
The order is: eggs first, then the spread, then the Shriekers, which are the highest priority right after the eggs. Two Shriekers alive together deal a lot of damage.
The last platform
The next break brings you to the final platform, where the melee-healer-ranged layout no longer applies. You need a layout decided in advance; we used melee left, healers and mid-range DPS right, ranged behind at the center.
From there you soak while dodging the waves, the last spread arrives — with the only concern being waves coming from behind — and then the heart is hit.
At the end of the heart channel you don't wipe instantly: there's still a window in which the boss can be hit, and that's where the fight closes.
Mythic additions
What follows comes from the journal and has not been verified: our kill is on Heroic.
 Hardened — the eggs have a large absorb and cannot be moved while the shell holds.
 Noxious Shell — an egg carrier cannot come within 3 yards of another carrier, or
  Noxious Splash causes an instant hatch and very heavy damage. Carriers must move spread out.
 Rancid Yolk — on egg removal, +200% Noxious Shell damage taken for 20 seconds.
 Toxic Womb and Blightscale Wretch — Mythic only, in phases 1 and 3. Ula'tek tears a gestating Wretch from the ceiling; it wakes after 20 seconds and uses
  Fester Burst, which damages anyone further than 10 yards away.
 Toxic Incubation — a spectral Ula'tek sends a venom cascade toward the Wretch, applying
  Mother's Boon: −10% damage taken and +15% damage dealt per stack. If a player intercepts the venom with their body, they take it instead and the Wretch gains no stack. Each impact generates Caustic Waves from the target's position.
- Blightscale Rawling —
 Boiling Venom after 25 seconds doubles haste and damage, and unlocks
  Acidic Expulsion.
  Revenge on Weakened Doomscales and cumulative
  Blight Vein.
- Slithering Clutch — in phase 3 the clutches crawl toward the scent of venom instead of staying put.
Assignment checklist
- Raid split into two mirrored groups, one Warlock each.
- Soak reference: proximity in phase 1, odd and even in the intermission.
- World markers placed on the arena corners for the intermission.
- Tanks on boss and tail, with neither ever out of range.
- Who takes the Warden past the grate on each platform.
- Grasping Fangs breaking order and the cooldowns tied to it.
- Who collects the small eggs and who takes the big one, in that order.
- Bloodlust at 1:55 and cooldowns on both heart windows.
- Composition of the three phase 3 groups, balanced by number.
- Layout for the final platform.
Loot
| Difficulty | Item Level | Currency |
|---|---|---|
| LFR | 289 (Veteran 4/6) |  Veteran Mistcrest Veteran Mistcrest |
| Normal | 302 (Champion 4/6) |  Champion Mistcrest Champion Mistcrest |
| Heroic | 315 (Hero 4/6) |  Hero Mistcrest Hero Mistcrest |
| Mythic | 344 (equivalent to Myth 9) |  Myth Mistcrest Myth Mistcrest |
Universal token:  Slumbering Coil Curio, valid for any class and any slot. Turned in to Kirana, outside the Silvermoon Catalyst (
/way #2393 40.3 64.7).
Very Rare weapons, both cantrip:
 Zatha'tek, Breath of Corruption — 1H Dagger
 Jan'thrazet, the Soul Fang — 1H Dagger
Venomcursed gear, with bonuses to some secondary stats at the expense of others, retained even after Catalyst conversion:  Venomkeeper's Horrific Cowl (Cloth Helm),
  Gaze of the Coiled Watcher (Leather Helm),
  Awoken Dreadfang Cuirass (Mail Chest),
  Chausses of Unbound Rancor (Plate Legs).
Other notable drops:  Font of Venomous Rage and
  Voracious Heart of Ula'tek (trinkets),
  Jaw of the Shackled Goddess,
  Abyssal Broodfiend's Bardiche,
  Caustic Repose Greatbow.
Mount:  Primeval Skyfriend, Mythic only.
Player housing trophies, based on the difficulty Ula'tek is killed on: Argent Trophy (LFR and Normal), Aureate Trophy (Heroic), Gleaming Trophy (Mythic).
Achievements:  The Venomous Abyss: Ula'tek ·
  Ahead of the Curve ·
  Mythic: Ula'tek ·
  Cutting Edge ·
  Hall of Fame ·
  Guild Run ·
  No Egg Scramble
Guild guide. Ability names verified on Wowhead. Strategy based on our kill on Heroic difficulty.
Did this guide help?
One click tells us it is worth writing more of them.